Showing posts with label easy recipe. Show all posts

Sunday, June 26, 2016

Salted Caramel Overnight Oats (HCLF)


If you've ever spent more than two seconds on my blog, you probably know about my undying love for salted caramel. I've been a salted caramel enthusiast for about five years now, dating way back to my pre-vegan days. I went vegan before salted caramel hit the mainstream and I thank God for that each and every day.. it definitely wouldn't have been healthy.


I've been on a mission ever since then to create healthy salted caramel dishes, and once I discovered the beauty of the medjool date, I haven't looked back once. Now, overnight oats aren't exactly the prettiest meal. They are, however, such a simple dish, and are perfect for those mornings when you have zero time, or simply don't feel like cooking. They're also great for those warmer mornings when you still want porridge. (I.E. all you people in the other hemisphere that aren't in freezing cold winter right now!)

What you'll need:

  • 1 cup of rolled oats
  • 2 medjool dates
  • 1 ripe banana
  • 1 tsp vanilla essence/extract
  • 1 cup of water
  • a pinch of salt (OPTIONAL!)
What you'll need to do:
  1. In a blender (or food processor), mix together the banana, dates, vanilla and water until completely combined.
  2.  Get a container, or jar if you're feeling particularly hip, and add in the cup of rolled oats.
  3. Mix in the liquid from the blender until it completely covers the oats.
  4. It shouldn't be TOO runny - if you're finding it is, add in some more oats until you're happy with the consistency.
  5. Put in the fridge overnight, or for at least eight hours.
  6. Take out in the morning and serve! You can always add in some extra fresh fruit on top, but this is totally optional. The oats taste great by themselves!


If you don't eat salt, feel free to leave it out. It isn't a must.. although it is extremely delicious. Let me know if you try this recipe out! 

Saturday, June 4, 2016

Vegan Nuggets (HCLF)


Vegan nuggets are delicious. Regardless of the brand, they taste good. However, store bought nuggets are full of all kinds of ingredients and don't leave you feeling so great. I've been trying to make the perfect vege burger over the past couple of months and somehow stumbled across this perfect combination of plant products that creates a delicious, but HEALTHY, nugget! You can eat as many of these as you like - HOORAY!

Everyone can enjoy these nuggets - they're vegan, gluten free, oil free, nut free, soy free.


What you'll need:

  • 400 grams of chickpeas (usually one whole can)
  • 1 tbsp onion powder
  • 1 tbsp garlic powder
  • 1 tbsp nutritional yeast
  • 1 tsp mustard
What you'll need to do:

  1.  Pre-heat your oven to 200 degrees Celsius.
  2.  Drain your chickpeas and rinse them thoroughly. I recommend saving the liquid as it becomes aquafaba and is SO versatile. I'll be posting recipes using it soon!
  3. Put all of the ingredients into a food processor or high-speed blender.  You CAN just mash everything together with a fork - however it takes a lot longer and is quite painstaking. 
  4. Blitz together for about a minute. Be sure to not over do it! You may need to push the sides down but be sure to just mix until well-combined.
  5. If you have any chickpeas that didn't blend, just mash them with a fork.
  6. Take the mixture out of the processor and form into nugget like shapes.
  7.  Place down on a lined tray and put into the oven.
  8. Cook for about 20 minutes or until golden brown. Flip them over at half-time to ensure they cook evenly.
  9. Leave them to sit for about five minutes and then enjoy!

          
    Let me know if you try them out! They're best served with tomato or barbecue sauce - or even spicy mayo ;)

Sunday, May 1, 2016

The Easiest, Healthiest, Tastiest Granola/Muesli EVER! (HCLF)

I used to think that granola was what American's called muesli. Apparently I was wrong. I still don't really understand the difference though so I'm calling it both. Regardless of what it's called, it's delicious, nutritious AND it doesn't have any oil. Hooray!This muesli tastes AMAZING and it is SO good for you. I love putting it on top of smoothie/acai bowls or just having it by itself with some banana mylk. Not to mention it leaves your house smelling incredible.


What you'll need:

  • 2 cups of rolled oats
  • 1 tbsp of maple syrup
  • 4 pitted and chopped up fresh medjool dates 
  • As much cinnamon as you desire
  • OPTIONAL EXTRAS: desiccated coconut, dried fruit, nuts, ect - if you add a lot of these just add some more maple syrup.

What you'll need to do:
  1. Preheat your oven to 180 Celsius. 
  2. Dump all of the ingredients in a food processor (or high speed blender - I'm using a Vitamix) and pulse at 5-10 second intervals for about a minute. You do NOT want the ingredients to blend completely, but rather just incorporate into one and other.
  3. Place everything on a lined baking tray and disperse the ingredients evenly to ensure it all bakes properly.
  4. Put in the oven for 10-15 minutes or until golden brown and crunchy. 
  5. Take out of the oven and leave to cool for about 30 minutes.
  6. That's. Literally. It. Enjoy your muesli and let me know if you try it out!

Muesli should store in an air-tight container for about 1-2 weeks. 

Sunday, April 24, 2016

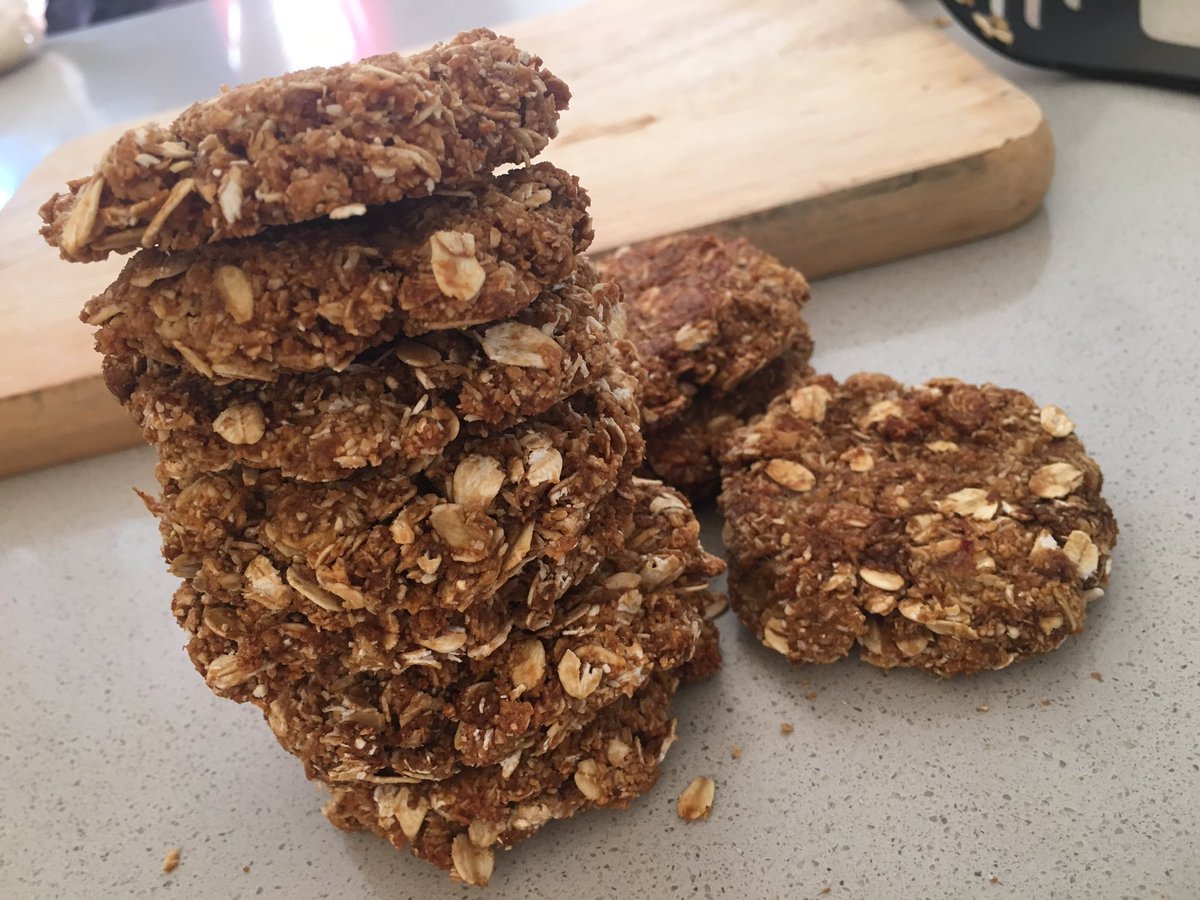
Vegan Anzac Cookies! (HCLF)


What you'll need:


1 + 1/2 cups oat flour
1/2 cup rolled oats
1/4 cup coconut sugar
1/4 cup desiccated coconut
1 cup boiling water
1 tbsp blackstrap molasses 
1 tsp baking soda
1 mashed over-ripe banana 


What you'll need to do:
  1. Preheat oven to 180 degrees Celcius.
  2. Combine all dry ingredients in a bowl, slowly add in the boiling water
  3. Add in the rest of the wet ingredients and the mashed banana. Mix until its beginning to clump together. Add in extra flour if the dough is too wet.
  4. Form mixture into small balls and flatten. Place on lined tray.
  5. Bake for 15 to 20 minutes or until golden brown. 
  6.  Enjoy!


Friday, March 25, 2016

Wholesome Hot Cross Buns

Hot cross buns. They are my absolute favourite. When they get put on the shelves in early January I am the one and only person (except my fiancé who genuinely downs three packets a day) who is there cheering wishing they'd come out even earlier.

HOWEVER. This year, I've really changed up my diet (more on that in a future blogpost) and I'm finding I'm becoming more and more sensitive to foods with oil. I didn't want this to get in the way of me downing stupid amounts of hot cross buns every morning so I've made my own, and let me tell you - they are better than the ones you get from the bakery. (AND THERE'S NO MILK SOLIDS! HOORAY!)


They're ugly, but they're delicious. Promise.


What you'll need -

2.5 x cups of flour 
2 x tsp yeast
1 x cup of sultanas/dates/both
1 x tsp sugar (used to activate the yeast)
1/2 cup soy milk
1/2 cup warm water
1/3 cup apple sauce
2 x tbsp of cinnamon (or more if you like)
1 x tsp nutmeg
1 x tsp ginger
1 x tbsp orange juice
the zest of one orange 
1 x tbsp maple syrup
1 x tbsp vanilla essence 


What you'll need to do -
1. Warm up your water, soy milk, yeast and sugar in a pan over a hotplate. Ensure the milk does NOT boil, and keep it warmed for around ten minutes.

2. In a bowl, sift in your flour and spices. Add in your orange zest and juice.

3. Fold your milk mixture into your dry ingredients slowly.

4. Once well combined, add in maple syrup, vanilla and apple sauce.

5. Knead the dough for five minutes. If it is getting stuck to your fingers, add in a slight bit more of flour.

6. Add in your sultanas or dates or both. I used to think I hated sultanas and I still kind of think that sometimes, so I've tried this recipe with dates as well. Both work fine.

7. Knead the dough again for another five minutes.

8. Move mixture to clean bowl and cover with a tea towel and place in a warm place for about an hour. The dough should almost double.

9. Roll your dough into small bowls and place in a non-stick pan. Cover with tea towel for another hour. 

10. optional -  if you would like to draw crosses on your buns to make them seem more legit, simply mix together flour and water in a bowl until it's quite thick and draw them on top with a knife. I can't do this nicely to save my life, but you might be more successful than me.

11. Put in oven for 30-35 minutes.

12. ENJOY! These bad boys will make your house smell incredible, but will also make you feel good too. Let me know if you try them!

Monday, March 7, 2016

Homemade Oat Milk

Over the past three months, I've been following a completely oil-free diet in an attempt to cure the magnitude of stomach aches that I've suffered with my entire life. Surprisingly, I think I've finally found something that works and I'll definitely be keeping oil off the plate in the near future. (If anyone would like a blogpost about this, please let me know!)

One of the hardest things to find without oil is milk. Can you believe that almond, coconut, soy, rice, oat and hemp milks all (typically) have added oils? Not only is that weird, it's also almost (not quite) as frustrating as 'added milk solids'. Ugh. So.. I did what I always do and I've made my own! Yay!


What you'll need:
1 x cup rolled oats
3 x filtered water
1 x tbsp vanilla essence 
OPTIONAL: sweetener of your choice (I left this out)
A fine sieve, a blender and some cups/bowls.

What you'll need to do:
1. Thoroughly rinse and drain your oats to remove any slime that may form when blending the milk.
2. Blend your oats, vanilla and water together until well combined.
3. Once blended, pour through fine sieve. This can be time consuming, but shouldn't be too difficult.
4. Repeat steps 2-3 again to ensure the oats are well combined.
4. Store in an air-tight container in the fridge for about five days.

Monday, November 30, 2015

The Perfect Pancake Recipe.


That's right... These pancakes are GOOD for you!?!? (Well, that's until you add the Hershey's syrup and the So Good ice-cream on top... BUT THEY'RE STILL VEGAN!?)

What you'll need:
1 x LARGE overripe Banana
1 x cup of oat flour (you can use almond meal or regular flour if that's more your thing. I can only vouch for oat flout though!)
1 x cup of water.
1 x tsp of baking powder
1 x tsp of vanilla

OPTIONAL:
cinnamon
dairy free chocolate chips
blueberries


What you'll need to do:


1. Make your oat flour. Please don't buy overpriced oat flour. Just throw a cup of oats in a blender/food processor and blend for a few seconds until it's a flour like consistency.

2. Add in a smashed up banana. Make sure your banana is SUPER overripe!

3. Mix in the water, baking powder, vanilla and any other optional ingredients you like.

4. Cook like a regular pancake! I use a non-stick pan, but if you don't, just add a bit of oil to a pan and cook until bubbly on one side. Then flip. Then repeat.... and throw out the first one because the first one is always a fail.

5. Enjoy! Make sure you always eat pancakes on Sundays. It makes your Sunday just that little bit better.